I couldn't resist putting these fabric buys with some incomplete bocage. And, of course, some figs.
Tuesday, March 27, 2012
The Hills are Alive...
| My Hills |
I've made my own with some cheap Styrofoam from some electronics. And I've just started making some out of some left over blue foam.
But I always like to get other ideas.
Here a few that caught my eye:
3T-Studios
The Command Tent
A MiniWargaming video tutorial (for bigger scale games than 6mm, but concepts are still good.)
Monday, March 26, 2012
Oh The Places We'll Go
Went to JoAnn Fabrics today - Who would've thought? Not me.
Anyway, they have a lot more there than fabrics. As I had the employee cutting these, she was obviously curious. And I had already pulled up one of my pictures of Jerry's tables to guide me in my buying.
I said, "I'm trying to match this table."
"Oh, that's cute. Is that a model railroad?"
I'm thinking, "cute" and "war gaming", hmmmm?
"Actually, it's for wargaming."
"Wargaming.?."
Anyway, she was very helpful and didn't seem too put off by it. And I browsed around the store and they have several other things I could use there.
My main focus was the fine corduroy, the lighter brown one at the top left of the photo. But I I bought a couple others for variety of color. Then I found the green one and thought it would make for a good forest floor. I will wash it and fade it out a bit before use.
I also hope to touch up the corduroy with some dry-brushing.
Friday, March 23, 2012
Naval Thunder Comparison Renown v Littorio Pt 3
Part III - Gun Data
We’ve got the basic ship stats down. Now, let’s look at the stats for the guns and how these actually play out in a couple of examples.
Main Battery
The first section shows the Main Battery guns for each ship. They show the size, the number of guns in each turret, the number of turrets and the arc of fire (F=Forward, P=Port/Left, S=Starboard/Right, A=Aft)
For example, facing in the F/P/S arc of fire, Renown has 15” Guns(this matters in gameplay as you’ll see later). There are 2 guns in each turret and there are 2 Turrets. Therefore, in that arc of fire, Renown can bring a total of 4 guns to bear on a target. In the R/P/S arc of fire there is 1 turret with 2 guns, meaning in that arc of fire there are two guns to fire at a target.
You’ll notice though that all the guns can face in the P and S arcs. Therefore, all the main guns could focus their fire in one of the two arcs. Renown could target a total of 6 guns on one enemy ship! You can target each turret at a different enemy ship. Though I’m not sure how wise that is.
Basically when it comes time to shoot, you’ll fire 1d10 for each gun you’re firing.
You read the stats for the secondary batteries in the same way. For example, in the Port arc of fire Renown could fire up to 10 guns in one turn. (2 guns per turret x 5 turrets).
(BTW - I remember port=left from starboard=right because port has fewer letters than starboard and left has few letters than right.)
Therefore, the Renown can bring a max of 6 of it’s main guns to bear on any one target. The Littorio can bring 9 main guns.
For secondary guns, Renown can bring a max of 10 guns. In certain ranges, Littorio can bring a max of 12 guns on one target. I say, “in certain ranges,” because Littorio has two different sizes of secondary guns that have different range bands.
Number of Main Battery Guns Advantage: Littorio
Number of Secondary Battery Guns Advantage: Littorio
Main Battery Gun Power
Again, it shows the size. Then it breaks each gun down to a range band in inches: Short, Medium, Long, Extra Long. Then it shows Pen or Penetration value of a gun. And finally, the damage the guns’ shells inflict.
For example, The Renown’s main 15” guns have a max range of 60”. 45” is considered Long range. 30” is considered Medium range and 15” is considered short range. This makes a difference because range bands can add/subtract various modifiers. Whereas, the Littorio’s main guns have a range band of: max is 80”; long is 60”; medium is 40”; short is 20.
Next is the “Pen” or penetration value of the shell. The Renown’s main battery shell’s penetrate with a 12. The Littorio’s with a 14. Remember, you add this to a roll of a d10 plus modifiers and compare it to the target’s armor value to determine the amount of damage you inflict. You’ll see this later in the example of shooting.
Finally, Dmg or Damage per shell hit is shown. The Renown and Littorio main guns both inflict up to 10 points of damage for each gun/shell that hits. If the shells don’t penetrate, then half damage is applied. If there is no way, even by rolling a 10 that a shell could penetrate, then no point damage is taken. However, if a natural “10” is rolled then a “superstructure critical” roll is made.
Normally you roll 2d10 to determine critical damage and apply damage points. However, on a superstructure roll you only roll a 1d10 and don’t add any damage points from the shell hitting - though you may take some from the critical hit. By rolling just 1d10 you won’t have the chance of having some thing like a magazine explosion.
Overall Range Advantage: Littorio
Overall Penetration Advantage: Littorio
Overall Damage Advantage: Neither
Torpedoes
Torpedoes list size, range band in inches, what kind of mounts, the number of tubes on a mount and then the arc where the torpedoes are mounted. In the case of Renown (no torpedoes on Littorio) she has 21” torpedoes, with a range band of: short is 4”; medium is 8; long is 12”. They are double mounted with 2 mounts in each port and starboard arc.
Here’s how you shoot and determine torpedo attacks. At the beginning of the ship’s shooting phase you record the target of the torpedo attacks. At the end of all the ships’ shooting phases you determine the result of the torpedo attacks. You determine these for each mount. You also use the same “Target/To Hit number” as your base. Again, there are modifiers based on a variety of factors. You roll a d10 for each mount. In the case of the Renown you would roll 2d10 if you were firing the port or starboard torpedos.
For every successful hit rolled, that means a torpedo from the mount hit. If that is the case, then you get to roll for the other torpedoes in the the mount to see if they hit.
Torpedo Advantage: Renown
Aircraft
This is something I’ve not played yet. I’m not clear on the mechanics yet, and in this example, the plane that Littorio carries won’t help. Thought it could be of assistance in a longer run battle with Renown, depending on the circumstances. The plane is designated as an “R”, which mean reconnaissance. Basically a recon plane can help with targeting for the main battery.
Aircraft Advantage: Littorio
If you look at the complete chart of pluses, it looks like Littorio comes out in the lead 9-4.
Next up, because this is already quite long, we look at an example of shooting from two different ranges.
I need an editor!
Labels:
1:3000,
Naval,
Naval Thunder,
Rules,
rules tutorial,
WWII
Litko Bases Arrive - Quick Preview
Received the wooden Litko bases yesterday. This wood feels like I could snap it, but it also feels sturdier than balsa wood. The surface is also very smooth. The edges appear to be burnt.
They are 1.6mm thick (They also make a 3mm version). I bought 4 sizes and realized just a few minutes ago as I was measuring up the ships to them that one of the sizes, 60mm x 30mm, isn't for the ships. I got these if I decide to try painting up some 6mm samurai for Impetus.
Labels:
1:3000,
Basic Impetus,
Davco,
Hobby,
Naval,
Naval Thunder,
WIP
Thursday, March 22, 2012
Various Items of Interest
A few things that have come up via email, blog posts of interest I've seen and couple other topics...
Maps to Fly By
Dave, creator of the map seen a couple posts ago has had a few questions about how his map and how he created it and if the file is available. Yes, it is. He posted it over at Board Game Geek. Go check it out. Thanks Dave for providing it.
Sales and Marketing
I don't play Flames of War and currently don't have any plans to do so. But that doesn't mean I'm not impressed like crazy at the company they are building. They have a very active forum. They gave away free v3 rule books to previous v2 buyers (GREAT), they get people involved in historical gaming (and some do/might transition to other games), and it brings history alive to people who might not otherwise have paid much attention to WWII. I'm aware of many of the issues with the game.
And, most impressive to me are the videos they're creating to teach newbies the game. The first one was kind of stiff, but that's gotten better. I'm not sure about the uniforms...this may actually "scare" a few people off, whatever. They seem to be growing fine without this, yet, they're taking the time and money to make these videos. Very well done and very informative to learn the game.
Don't Know Much About History
Speaking of learning about history, The Wargaming Site blog is running a great series of entries called "Famous Battles You Should Know About". He's giving some history about battles that we all hear about or played but may not know much about. With these he gives history, tactics, why the battle mattered, how to wargame it, etc. Great stuff - keep it up. So far he's covered Gaugamela, Waterloo, and Zama.
Even More History and Possible Con Scenario
Over on the Yahoo 6mm wargaming group, someone shared with me something called Task Force Baum. A task force put together in March 1945 to go liberate a POW camp...or rescue Patton's son-in-law, or feint an attack, or...whatever, it was a disaster. He shared this with me after reading my previous post on A Tale of Two Prisoners. But this may make a fun Con Scenario that could be played in a 2-3 hour slot.
Impressive War Game Club
Back to Dave: he recommended a club newsletter called, "Warning Order." I'd seen it and read several of them before. However, thank you Dave for bringing it back to my attention. It's an amazing creation from a club. Free and lots of AARs and reviews. Keep it up guys.
Bring The Pain and Links
Finally, and this is a link fest blog post, so this is appropriate to "discuss": I saw a somewhat off the cuff remark in a post at World of Wonder via the House of Paincakes (speaking of link fests) that mentioned something about link-filled blog posts. The author and interviewee favored putting all the links at the end of the blog post. One argument is that people may not finish the article and get lost in the links to a never-ending rabbit hole. I can see that argument, but I also like all the links.
Which do you prefer:
Links embedded in the post?
or
Links at the end of the post?
That was going to be my last comment, but then I remembered the post I saw at Lord Ashram's about the new turn based iPad war game called Battle Academy. Looks pretty cool. And to think it may only cost me $820 to buy...'cause I don't have an iPad...though maybe I need to do that? Right.
I'm going to say it again about Lord Ashram's table - AWESOME. And let's end this post with a shot of this great table and room:
Maps to Fly By
Dave, creator of the map seen a couple posts ago has had a few questions about how his map and how he created it and if the file is available. Yes, it is. He posted it over at Board Game Geek. Go check it out. Thanks Dave for providing it.
Sales and Marketing
I don't play Flames of War and currently don't have any plans to do so. But that doesn't mean I'm not impressed like crazy at the company they are building. They have a very active forum. They gave away free v3 rule books to previous v2 buyers (GREAT), they get people involved in historical gaming (and some do/might transition to other games), and it brings history alive to people who might not otherwise have paid much attention to WWII. I'm aware of many of the issues with the game.
And, most impressive to me are the videos they're creating to teach newbies the game. The first one was kind of stiff, but that's gotten better. I'm not sure about the uniforms...this may actually "scare" a few people off, whatever. They seem to be growing fine without this, yet, they're taking the time and money to make these videos. Very well done and very informative to learn the game.
Don't Know Much About History
Speaking of learning about history, The Wargaming Site blog is running a great series of entries called "Famous Battles You Should Know About". He's giving some history about battles that we all hear about or played but may not know much about. With these he gives history, tactics, why the battle mattered, how to wargame it, etc. Great stuff - keep it up. So far he's covered Gaugamela, Waterloo, and Zama.
Even More History and Possible Con Scenario
Over on the Yahoo 6mm wargaming group, someone shared with me something called Task Force Baum. A task force put together in March 1945 to go liberate a POW camp...or rescue Patton's son-in-law, or feint an attack, or...whatever, it was a disaster. He shared this with me after reading my previous post on A Tale of Two Prisoners. But this may make a fun Con Scenario that could be played in a 2-3 hour slot.
Impressive War Game Club
Back to Dave: he recommended a club newsletter called, "Warning Order." I'd seen it and read several of them before. However, thank you Dave for bringing it back to my attention. It's an amazing creation from a club. Free and lots of AARs and reviews. Keep it up guys.Bring The Pain and Links
Finally, and this is a link fest blog post, so this is appropriate to "discuss": I saw a somewhat off the cuff remark in a post at World of Wonder via the House of Paincakes (speaking of link fests) that mentioned something about link-filled blog posts. The author and interviewee favored putting all the links at the end of the blog post. One argument is that people may not finish the article and get lost in the links to a never-ending rabbit hole. I can see that argument, but I also like all the links.
Which do you prefer:
Links embedded in the post?
or
Links at the end of the post?
That was going to be my last comment, but then I remembered the post I saw at Lord Ashram's about the new turn based iPad war game called Battle Academy. Looks pretty cool. And to think it may only cost me $820 to buy...'cause I don't have an iPad...though maybe I need to do that? Right.
I'm going to say it again about Lord Ashram's table - AWESOME. And let's end this post with a shot of this great table and room:
Wednesday, March 21, 2012
BKCII A Tale of Two Prisoners
The situation: Both sides, US and German have each captured a very important prisoner and are holding them in town, in the case of the Germans. And, the US is holding their prisoner in a makeshift fort with barbed wire and a trench. In that trench is a 76mm Sherman that can't move out - so essentially it's like a pillbox. I can imagine coming up with some fun backstory for these prisoners and why they were both so important - any ideas?
The objectives: US must travel the length of the board to rescue their prisoner. In addition, they must clear the only good bridge of Germans and barbed wire.
The Germans must rescue their prisoner and get them back to their table edge.
The forces
US
CO (9)
3 HQ (8)
Recce M8
Recce Stuart
5 Airborne Paras w Bazookas
Engineer w Flamethrower
2 MG
1 57mm AT gun
2 81mm Mortars
2 M5 Stuarts
2 Sherman 75mm
2 Sherman 76mm
1 M8 Scott
2 Priests (105mm) Off-Board (as I'm typing this, I just realized that I had two of these to use - blast)
1 155mm Off-Board arty
6 Half Tracks
1 Jeep
German
CO (9)
2 HQ (8)
FAO (7)
3 stands of Volkstrum
3 stands of Panzer Grenadiers with Shreks
2 MG 34/42
1 Tiger II
3 French R35
4 251
1 88mm
1 Off-board 105MM
I'm going to try just hit the highlights (Side note - US is on attack and moves first in the turns.)
Both sides had planned arty and smoke. However, much of it, especially for the Germans was pushed back and cancelled because the enemy wasn't where it was supposed to be. However, at least those registered targets were still available for future arty calls.
The plan:
US - Send the Shermans, Paras, on the left with the Engineer to clear the bridge and 88. Then, if time allowed support the assault on the town with the prisoner, guarded by a Tiger II in an AFV pit. (Hit on 6s and save on 2+...what do you think happened to this King Tiger...yeah, not much.
Send the Stuarts and M8 with Tank riders to get the prisoner. Leave the 57, MG, and Mortar behind to guard the trench fort.
Germans - Send the Pz Grens on the left to get the prisoner. R35, 88, King Tiger, and Volkstrum guard the right flank and bridge.
Turn 1
![]() |
| End of Turn 1 |
Turn 2
Another unfortunate thing for the Germans, they stalled within initiative distance of the paras. This allowed them all to unload without opportunity fire. And then, in the turn, after two commands for the paras and a command with the Shermans, all 3 R35 were gone.
![]() |
| End of Turn 2 |
Turn 3
US lose HT and 76mm Sherman to 88 fire. 1 of the German platoons guarding the bridge is pushed back.
Turn 4
Pz Gren Platoon lost in the woods.
![]() |
| 88 Sees 76mm in the distance, fires... |
US right is planning to go around the fields, in protection of the fields and hedges, and approach the town from the back.
King Tiger, however, doesn't have any problem with command, getting 3 in a row and takes out, on the hill, the M8 Scott M8 Greyhound, and a Stuart. Earning that Iron Cross.
![]() |
| And Gone! |
Turn 5
During US initiative, they finally suppress the platoon in the trench, Close assault and take them out. In addition, some good Sherman shooting takes out the 88.
Tiger, trying to repeat their last performance, rolls 9 dice at a Stuart on the hill. They hit on a 4+. Except Tiger rolls 8 2 and 1s! And (1) 6. A hit. Stuart saves on a 6. Roll and... a 6! Stuart crew cleans their shorts!
![]() |
| (3) KOs for King Tiger in Turn 4 |
German 3 Co is wiped out.
US Engineers make to bridge, next to barbed wire but takes 3 hits from the Tiger.
A US mortar is taken out during initiative on the German left as they approach the trench prison.
The Tiger, with much celebration by the US, fails command rolls and is silent for a turn. Germans attempt to go in for the Close Assault on the prison after laying down smoke. Again, command falls short.
The Germans are working their way through the trenches at the fort and have taken out the MG. Next up a CA of the Sherman.
![]() |
| End of Turn 4 |
Turn 7
During Initiative and two snake eye command rolls in a row(!), two Shermans attack the Tiger from the flank. After rolling30 dice, they get several 6es, but most are saved, except 1. They roll a 6 to hit. The Tiger rolls a 1 to fail a save. And then, MIRACLE, rolls a 6 to suppress!!!
They Engineers successfully clear the bridge.
The US gets into town, destroys the German CO, and rescues their prisoner!
Over on the other side of the map, the Germans close assault, like crazy, the Sherman. He suppresses many of the them, but they go in anyway because of the overwhelming numbers and the support - Blam! They take it out.
![]() |
| Germans facing CA by the US, and... |
The prisoner loads up on one of the transports to see if they can make it back. They get one more command to go 25cm. They fail a command.
Turn 8
US has accomplished their missions and now stay out of the way of the Tiger who can only react fire and opp fire. In addition, with the Grens obviously rushing back down the side of the table, the Stuarts take up positions to shoot and block them.
![]() |
| US finally clears out the bridge of Germans. |
Game over.
Also, the Germans had hit their breakpoint, but right at it, so they only needed to get a 9 or lower, they passed on turns 7 and 8.
Seemed like game started with both sides getting lots of failed or 1 time command rolls. However, there were several multiple commands. 1 blunder that caused a German MG to blunder into a CA with a HT. unfortunately, the HT had tons of support. I had two bonus rolls (rolling (2) ones on the command roll) in a row! Just at the opportune time for the US.
Pretty fun - crazy lists but lots of good CA practice, clearing wire, and arty practice.
![]() |
| Finally, after 30 dice - 1 hit and Suppression! |
![]() |
| Germans CA the Sherman to get their prisoner. |
![]() |
| They rush off...and stay there. |
![]() |
| End of Game Map - US Victory |
Monday, March 19, 2012
Fwd: BKC II Game & Geekway
Took a break from the Drydock to play this table my 9yr old setup. Will provide a more detailed AAR when it's finished. I'm through two turns and the US has already destroyed a German reclaimed R35 platoon.
The Germans had "surprised" the US platoon that was going to attack from behind a hill. However, failed command rolls left the R35s in the open.
The next turn saw a rain of bazooka and Sherman fire take em down. The Co had to command them because both platoons had failed their initial command rolls.
after turn 1
After turn 2
My other hobby stuff was my work on getting the volunteers/potentials lined up for Geekway 2012. This will take up a bit more time as we move deeper into April and May.
BMHGA is asking for GMs for Barracks Battles at Die-Con. I would love to, but don't know, w Geekway stuff if I can make that happen.
Friday, March 16, 2012
Naval Thunder Comparison Littorio v Renown pt 2
In a previous post I gave some of the basics to compare two ships in the
Naval Thunder game, the HMS Renown and the Italian Littorio.
Target Number
NT uses d10s and each category of ship has a particular “Hit on” or Target number. For example, every Battlecruiser and Fast Battleship are hit on a roll of 7+. (A Battleship is hit on a 6+, and destroyers are hit on 9+. Though, there is talk of making destroyers have a “hit on” or target number of 10+.) This number can be, and is usually modified by a number of factors such as the range to target (ranging from 0 to 5); if the shooter has Fire Control (0 or -1); Rate of fire (shots at 20” or less); various conditional criteria (how far target moved, shooter has severe list, etc.); Crew and other technical modifications; and modifiers for torpedoes.
Advantage: neither.
Hull Points
Next
stat is the Hull, these are a number of points, in this case, Renown
has 138, and Littorio has 150. After each hit, penetration and damage
are determined and each gun does a specific amount of damage. For
example, the main guns on the Littorio does 10 points of damage for each
hit. So, one hit would take the Renown down to 128. Of course, when
this reaches 0, the ship is out of commission. You can run the ship at
full speed and shooting even if down to 1 hull point.
However, this is very unlikely because, other issues like flooding, fires, bridge hits, rudder hits, main/secondary battery loss, etc will usually take effect, making a 1 hull point ship a very ineffective ship.
Advantage Littorio..
Speed
This is based on inches moved each movement phase. Both ships move 8”.
Advantage: neither.
Move Step
The sequence of play for NT is quite long. However, after a couple of turns, most of it becomes second nature. Each turn is broken down into phases. They are:
I. A/C & Submarine Battle Phase
II. Movement Phase
A. Battleship Movement
B. Cruiser Movement
C. Destroyer Movement
III. Shooting Phase
A. Battleship Shooting
B. Cruiser Shooting
C. Destroyer Shooting
D. Torpedo Shooting
IV. End Phase (damage and command checks, etc)
Within
each phase are several steps, but you get the point. Movement is
simultaneous. For example, at the beginning of the Battleship Movement
phase every player writes down their orders for how each Battleship,
Fast Battleship and Fleet Carrier is going to move. Then, at the same
time all players move those ships. You then do the same for Cruisers and
Destroyers.
(Side note: I didn’t think I would be a fan of the simultaneious movement. However, after a couple games of Johnny Reb III and then a solo run through of NT, I like it.)
As you can see, it’s advantageous to move in the later steps because you can see where the slower and bigger ships moved. In this case, the Renown is classified as Battlecruiser and therefore moves in the second Cruiser Movement step. Littorio, though a Fast Battleship, still moves first in the Battleship Movement step.
Advantage Renown.
Shoot Step
Similar to movement, shooting is simultaneous within each shooting step. So, in this case all ships classified, for shooting, as Battleships will shoot at the same time. Their hits on each other won’t affect their shooting during the current turn. However, their hits on the smaller and later shooting steps will be affected and may not get a chance to shoot if damaged during the Battleship step. Battleships, Fast Battleships, and Battlecruisers all fall into the Battleship category for shooting.
Advantage: Neither.
Fire Control
This is broken down into four categories based on the nationality. In this example, the Renown as RDR which gives it a -1 modifier to the Target number for targets in the Short, Medium, and Long Ranges. (Note: There is an X-long Range. Also,German radar only gives a -1 to the target number at Long range.) The Littorio is just STD, or standard and gets a modifier to target of 0.
Advantage Renown.
Armor Value (AV)
This represents the main armor of the ship that recieve the bulk of the hits when fired upon. When a hit is a achieved on a target, the shooter takes the “Penetration” factor of the gun they shot, add a d10 roll to it, add or subtract one of 5 modifiers and if this number is greater than the target’s AV then full damage is taken and another roll is made to see what critical damage is taken.
If the Penetration+d10+modifiers is equal to or less than AV then half damage is applied to the ship. If there is no way the shell, with Penetration+d10+modifiers, can equal AV even if a 10 is rolled, then there is no hull damage. However, if a natural “10” is rolled then a “superstructure critical” roll is made...more on that in a later post. Renown is 14 and Littorio is 18.
Advantage: Littorio
Secondary Armor Value (SAV)
This is the protection against torpedoes. It operates the same as AV, but just with torpedoes. Littorio is 6 and Renown is 5. Close, but in this case Littorio doesn’t have torpedoes and Renown does.
Advantage: Littorio
Anti-Aircraft/Submarine Warfare (AA/SW)
I’ve not played with Aircraft or submarines yet. However, basically every ship in the fleet, against an air attack, totals their AA number and rolls this number of d10 against all aircraft attacking them. 10+ hit and knock down the aircraft.
The same manner of play is used when defending against submarines. Total the SW ratings and roll this number of dice against the subs. 8+ hit.
There are more nuances to the rules, modifiers etc. But that’s about as much as I’m going to say about these since I’ve not experienced them before. But looking at the numbers:
AA Advantage: Renown
SW Advantage: Neither
Conclusion
If you look at a chart with pluses and minuses of advantages for the basic ship stats, it appears that Littorio has a slight advantage with 3 to 2. The movement advantage is a big deal because the Renown Captain can adjust their placement to get out of a harmful shot or to position for a better shot. The fire control is nice...if the ships had similar guns. More on that later.
The Littorio has advantages on stats that can help it to be much more resilient to damage. The AV
difference is big, 4 points. This will help them not take serious damage more often than the Renown. In addition, more hull points means it will be in the fight longer.
In a future post we’ll compare their guns by looking at the stats and looking at a couple turns of firing.
And thank you all, we reached 50 followers!
Target Number
NT uses d10s and each category of ship has a particular “Hit on” or Target number. For example, every Battlecruiser and Fast Battleship are hit on a roll of 7+. (A Battleship is hit on a 6+, and destroyers are hit on 9+. Though, there is talk of making destroyers have a “hit on” or target number of 10+.) This number can be, and is usually modified by a number of factors such as the range to target (ranging from 0 to 5); if the shooter has Fire Control (0 or -1); Rate of fire (shots at 20” or less); various conditional criteria (how far target moved, shooter has severe list, etc.); Crew and other technical modifications; and modifiers for torpedoes.
Advantage: neither.
Hull Points
| Littorio |
However, this is very unlikely because, other issues like flooding, fires, bridge hits, rudder hits, main/secondary battery loss, etc will usually take effect, making a 1 hull point ship a very ineffective ship.
Advantage Littorio..
Speed
This is based on inches moved each movement phase. Both ships move 8”.
Advantage: neither.
Move Step
The sequence of play for NT is quite long. However, after a couple of turns, most of it becomes second nature. Each turn is broken down into phases. They are:
I. A/C & Submarine Battle Phase
II. Movement Phase
A. Battleship Movement
B. Cruiser Movement
C. Destroyer Movement
III. Shooting Phase
A. Battleship Shooting
B. Cruiser Shooting
C. Destroyer Shooting
D. Torpedo Shooting
IV. End Phase (damage and command checks, etc)
| Renown |
(Side note: I didn’t think I would be a fan of the simultaneious movement. However, after a couple games of Johnny Reb III and then a solo run through of NT, I like it.)
As you can see, it’s advantageous to move in the later steps because you can see where the slower and bigger ships moved. In this case, the Renown is classified as Battlecruiser and therefore moves in the second Cruiser Movement step. Littorio, though a Fast Battleship, still moves first in the Battleship Movement step.
Advantage Renown.
Shoot Step
Similar to movement, shooting is simultaneous within each shooting step. So, in this case all ships classified, for shooting, as Battleships will shoot at the same time. Their hits on each other won’t affect their shooting during the current turn. However, their hits on the smaller and later shooting steps will be affected and may not get a chance to shoot if damaged during the Battleship step. Battleships, Fast Battleships, and Battlecruisers all fall into the Battleship category for shooting.
Advantage: Neither.
Fire Control
This is broken down into four categories based on the nationality. In this example, the Renown as RDR which gives it a -1 modifier to the Target number for targets in the Short, Medium, and Long Ranges. (Note: There is an X-long Range. Also,German radar only gives a -1 to the target number at Long range.) The Littorio is just STD, or standard and gets a modifier to target of 0.
Advantage Renown.
Armor Value (AV)
This represents the main armor of the ship that recieve the bulk of the hits when fired upon. When a hit is a achieved on a target, the shooter takes the “Penetration” factor of the gun they shot, add a d10 roll to it, add or subtract one of 5 modifiers and if this number is greater than the target’s AV then full damage is taken and another roll is made to see what critical damage is taken.
If the Penetration+d10+modifiers is equal to or less than AV then half damage is applied to the ship. If there is no way the shell, with Penetration+d10+modifiers, can equal AV even if a 10 is rolled, then there is no hull damage. However, if a natural “10” is rolled then a “superstructure critical” roll is made...more on that in a later post. Renown is 14 and Littorio is 18.
Advantage: Littorio
Secondary Armor Value (SAV)
This is the protection against torpedoes. It operates the same as AV, but just with torpedoes. Littorio is 6 and Renown is 5. Close, but in this case Littorio doesn’t have torpedoes and Renown does.
Advantage: Littorio
Anti-Aircraft/Submarine Warfare (AA/SW)
I’ve not played with Aircraft or submarines yet. However, basically every ship in the fleet, against an air attack, totals their AA number and rolls this number of d10 against all aircraft attacking them. 10+ hit and knock down the aircraft.
The same manner of play is used when defending against submarines. Total the SW ratings and roll this number of dice against the subs. 8+ hit.
There are more nuances to the rules, modifiers etc. But that’s about as much as I’m going to say about these since I’ve not experienced them before. But looking at the numbers:
AA Advantage: Renown
SW Advantage: Neither
Conclusion
If you look at a chart with pluses and minuses of advantages for the basic ship stats, it appears that Littorio has a slight advantage with 3 to 2. The movement advantage is a big deal because the Renown Captain can adjust their placement to get out of a harmful shot or to position for a better shot. The fire control is nice...if the ships had similar guns. More on that later.
The Littorio has advantages on stats that can help it to be much more resilient to damage. The AV
difference is big, 4 points. This will help them not take serious damage more often than the Renown. In addition, more hull points means it will be in the fight longer.
In a future post we’ll compare their guns by looking at the stats and looking at a couple turns of firing.
And thank you all, we reached 50 followers!
Thursday, March 15, 2012
Naval Thunder Comparison Chart - Renown v. Littorio
As you've seen from previous entries I've been working on some 1:3000 Davco ships. These are British, Italian, and German as I want to play the Atlantic and Mediterranean in WWII. After the last game convention I did a bit of research on Naval rules and not being a huge draw I wanted something fairly straight forward. I.E. less stats and detail. I certainly see the appeal of General Quarters, but I knew I would never play something at that level on my own. Though, Adam, if you're reading this, I would certainly play in a hosted game.
Victory at Sea was another, more closely considered, WWII naval game. It also abstracts more things than GQIII. At the moment I can't recall why I moved over those for my own use...but again, The Composer, if you're reading, I would love to play a game your hosting...especially since your miniatures are so well done!
Ultimately, I decided to go with Naval Thunder and I'm pretty happy I did. I've done a couple of solo runs and look forward to trying them with an opponent.
(Side note: Go here to the View from the Turret review of GQIII and of Victory at Sea. They also review Naval Thunder here.)
While working on the ships, I've thought it would be interesting to take a couple of the ships and compare the stats to each other. For the first time, I picked the two ships that looked the coolest to me. Actually, the Italian ship Littorio looked the coolest with all the round secondary guns. Then I perused the British ships to compare it against and picked the Renown. Hindsight, I should have chosen a stronger British candidate, but they're fairly close... or are they?
I also thought this would be a good way to introduce some of the concepts of the Naval Thunder rules. I'll probably do this in 2-3 parts to avoid a book of an entry...wait, this is already a book.
In fact, I may end this now. In the next post, I'll discuss these basic stats and what they mean in the game and how they affect the performance and survivability of the each ship.
Though I will leave you with these little tidbits:
FC is Fire Control (RDR is radar and STD is not what you think it is...it's Standard)
AV is Armor Value, this is the main armor
SAV is Secondary Armor Value
AA is Anti-Aircraft value and
SW is Submarine Warfare value
d10s are the dice used in the game
move and firing for each ship type is simultaneous
move and firing is done in inches
each gun has a specific range band based on diameter and barrel length
each gun also has specific penetration and damage values as well
And, on a slightly different note: I just saw that The Composer has posted some new tutorials on how he built some of his ships. He knows how to model and paint 1:2400 ships - go check out the series beginning with this post.
| HMS Renown |
Ultimately, I decided to go with Naval Thunder and I'm pretty happy I did. I've done a couple of solo runs and look forward to trying them with an opponent.
(Side note: Go here to the View from the Turret review of GQIII and of Victory at Sea. They also review Naval Thunder here.)
| Littorio on the Right |
I also thought this would be a good way to introduce some of the concepts of the Naval Thunder rules. I'll probably do this in 2-3 parts to avoid a book of an entry...wait, this is already a book.
In fact, I may end this now. In the next post, I'll discuss these basic stats and what they mean in the game and how they affect the performance and survivability of the each ship.
Though I will leave you with these little tidbits:
FC is Fire Control (RDR is radar and STD is not what you think it is...it's Standard)
AV is Armor Value, this is the main armor
SAV is Secondary Armor Value
AA is Anti-Aircraft value and
SW is Submarine Warfare value
d10s are the dice used in the game
move and firing for each ship type is simultaneous
move and firing is done in inches
each gun has a specific range band based on diameter and barrel length
each gun also has specific penetration and damage values as well
And, on a slightly different note: I just saw that The Composer has posted some new tutorials on how he built some of his ships. He knows how to model and paint 1:2400 ships - go check out the series beginning with this post.
Labels:
1:3000,
Davco,
Hobby,
Naval,
Naval Thunder,
Rules,
Testing Rules,
WWII
Wednesday, March 14, 2012
"New" World War II Podcast
New to me anyway. This guy, Ray Harris, Jr, I believe a history major, started a podcast on the history of World War II. It's an interesting way to hear the history. He's basically a guy that's done a lot of research and then shares his "report" with us, the listeners.
He covers a lot of the basics that many of us would know, but also tries to get some more detail that we may have missed in our reading. In addition, I've focused my reading in certain areas of the conflict so am not clear on many other areas.
What's cool is that his style is such that he's just telling us what he's read, so he's not perfectly polished and will sometimes summarize and make editorial comments that seem out of place, but ultimately make it a fun way to listen. It's a great way to pass the commutes. And as a WWII nerd, it's like nirvana.
There's not much specialized on WWII in podcast/gaming podcast land so this is a nice addition.
http://worldwariipodcast.net/wordpress/
Give him a listen and rate him on iTunes.
Oh, and HAPPY PI DAY ALL YOU FOLLOWERS!
Tuesday, March 13, 2012
Dave's Maps and Aircraft Weathering
I asked Dave to share how he made his map and how he weathered the planes from Angels 20. I'll let Dave speak for himself:
First on the maps:
First on the maps:
The game mat images were all "screen captures" of Google map sections. The WWI field map surface was already digitally assembled into a high resolution image that I found on a fan website, and I added the trench section from a Google map image I found of a reenactor's battlefield in Pennsylvania.
I used four overlays of the same trench image, but some were flipped, reversed, and rotated so as to break up the regularity of the repeat trench image. The field and forest terrain on the master image was revealed by cutting away sections of the unwanted trench "overlay" using manipulation tools within my photoshop program (Paint Shop Pro), such as outlining and dragging away unwanted sections wholesale, and fine erasing along the borders of the wanting trench image(s) to reveal the "lower "map's fields and forest.
Lastly, I captured a section of shell holes, and isolated them on a transparent texture layer, which I repeatedly applied to the completed field and trench image to "meld" in the war-torn trench sections to the more pristine surrounding forest and fields.
The WW2 map was a similar process, but I "screen captured" each section of the selected Google map images (from around Dover England), and assembled these into a complete large map image. As I recall it took something like 10-12 individual screen map images to get the desired breadth of coverage.
The open-ocean texture (beyond the coastal wave images) was a free-source ocean texture I found on the web, which I re-sized for proper scale, and once made into a multi-sectioned large image, was layered and "melded" to the coastal waters using the same image removal and erasing techniques as for the above WWI trench section work.
The hex grid on the WW2 map comes from a number of sections of grids on a transparent layer which I overlaid in sequence to complete the pattern. Knowing the overall map dimensions wanted, and the number of rows of hexes at a particular individual hex size that should fill the map's area is necessary so that the printed map comes out as desired. I did "subdue" the opacity of the hex lines by successive eraser swipes (digitally), so that the hex outlines weren't so starkly contrasted against the map's background terrain.
The completed images files can be uploaded to a commercial printer who offers online service, and printed to the selected dimensions (in inches) on vinyl advertising banner material. Comes delivered to your house in a sturdy packing tube, which serves for transporting the mat to wherever the game calls. :)And now, a little about his weathering of the Axis and Allies, Angels 20 planes. The models are pretty impressive as is. But his subtle work helped immerse me even more in the game. Here's Dave:
The pigment I used was "Secret Weapon Weathering Pigment" in "Exhaust Black" color, but I imagine any good brand of pigment will work as long as its dark enough to give a model's etched details enough contrast against the surrounding surface colors.
I applied the pigment powder with a model brush making sure to dust it into the recessed details especially well, basically covering the entire model aircraft's upper surfaces completely with a thin layer of pigment (doing this over a piece of paper to catch the excess which drops off during the application).
After the pigment is applied, and after cleaning one's fingers off, with two sections of folded-over paper towels in reach, I began to wipe off the pigment on the model by drawing the towel flat across the surface, folding and turning over clean sections as needed (often).
Once the majority of the pigment has been removed, only the pigment in the recesses should remain, providing an enhanced contrast to the panel lines and joints. With the second paper towel, the insignia and things like painted stripes can be further cleaned with a moisten section of a towel, because the pigment tends to darken these areas, and they'll need to be brightened for better color clarity.
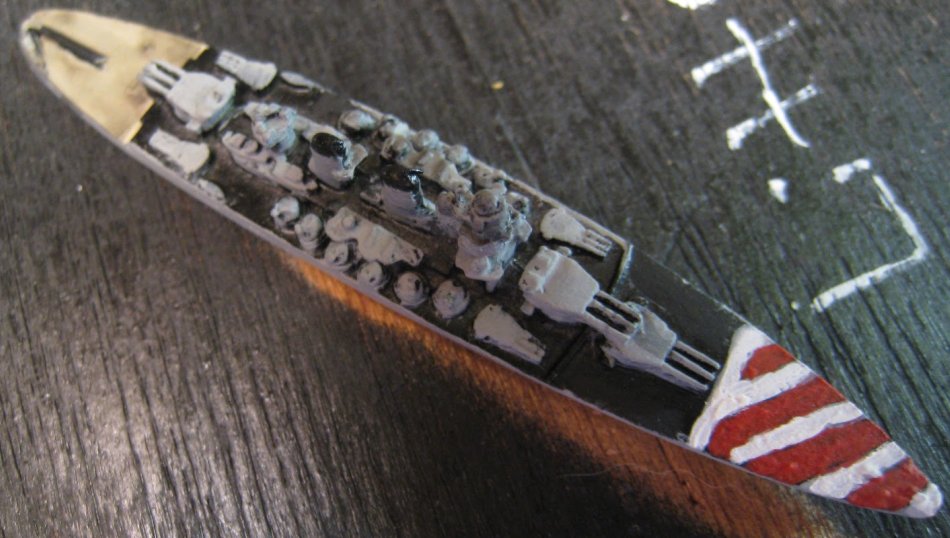
Lastly, the bottom surface must be checked and clean for any over-dusting, and then the model is ready for a coat a clear-flat spray finish, which will seal the pigment under it.
I think the pigment process could be used for other wargaming miniatures also, and especially for vehicles and even buildings. Any models that have good surface detail (I'm thinking of trying it out on pre-painted WW2 1/144th scale tanks too.
Labels:
Air,
Inspiration,
Interview,
miniatures,
painting,
WWII
Subscribe to:
Posts (Atom)


