Showing posts with label 6mm. Show all posts

Saturday, February 27, 2016

Playtest Armour Battles

I downloaded this free set of rules, written by Jim Bambra, Armour Battles Combat HQ. It's basically the Armour portion of a larger set of WWII rules where each stand is a platoon of troops and a troop of tanks.


They use an opposed die roll to help determine what you can do in your turn and it's also impulse/pulse driven throughout the turn. Meaning, player 1 performs an action with a unit or group of units, then player two does the same. This goes back and forth until each side uses all their available orders. Then a new turn begins with a new command roll.

Obviously I'm simplifying it a lot.
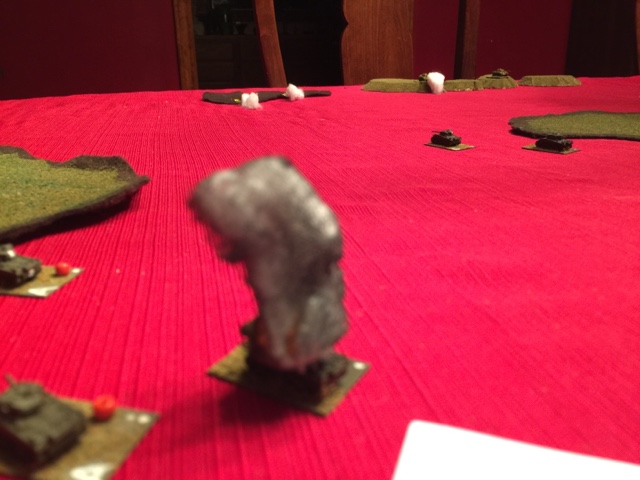
My first command roll. Blue are Germans. If you roll more 1's than 6's, you have a command failure. All your 1's go to the other side to use as wild dice. In this case, the Germans didn't get to do anything in the first turn. They still were able to opp fire.

Burning M4.

When a unit takes 3 disruptions (hits) it is destroyed. When a unit is destroyed your side loses d3 off it's army's morale. The first army down to 0 morale loses. In this case, the Germans won the day with 1 morale left.

You can rally the disruptions off with a command. You also can take suppression off with commands.

I like the variable # of commands. I like how simple it was to get a battle going, even faster than my beloved BKC II. And I like the variable morale damage. 

I still don't have my head wrapped around the order system, both for units and the higher level staff command. In addition there are artillery rules I this free set.

The complete rule set is due out very soon. It appears it will have everything you need for a complete WWII gaming experience.

http://wargamesdesign.com
http://wargamesdesign.com/rules/


Friday, January 15, 2016

Iron Cross Game 1 Turn 1 AAR Video

Playing my first game of Iron Cross, from Great Escape Games. 

As this was loading I realized at least one rules mistake i was making.

Command only allows you to re-roll, not subtract 1 from the command roll.


Tuesday, December 29, 2015

Baccus to Release 6mm in 2016

Baccus Sixmm​​ is releasing their WWII range in 2016.

https://www.baccus6mm.com/news/29-12-2015/OutwitholdyearandinwiththeNEW/

Friday, January 23, 2015

Retaking Veirville AAR - BKCII

Here I use Advanced Squad Leader Starter Kit, S1 as a template for a Blitzkrieg Commander II game. This one didn't turn out so good. US seemed way over powered. Being a first scenario for ASLSK, I believe it's supposed to be somewhat like a nice encounter battle.

This has me thinking how closely I should translate these scenarios. My first one played well as is. This one however, needs to be abstracted and used more as a guide.


Thursday, January 22, 2015

Clash at Borisovka AAR - BKCII

This is an all armor battle from the Advanced Squad Leader Starter Kit. I think this one turned out pretty well.


Sunday, November 16, 2014

Blitzkrieg Commander East Front AAR

Had a goal last night of getting a quick miniatures game in before going to bed. Of course, after laundry was done, dishes from dinner complete, and the kids were in bed, it  was about 9:30 PM. So I decided to go with the rules I know best, Blitzkrieg Commander II.
I've never played any of the built in scenarios in the book, but this time I thought I could use one of them and points (another thing I've never used) to build out a game. The reason I never use them is because i like fighting "historical" scenarios because I like the thought that I'm recreating a battle and at the same time learning a little more about the war. So, to make it not a completely random battle, I adopted a scenario from an I Ain't Been Shot Mum supplement. (Funny thing is, I believe the scenarios out of this battle are imaginary and based loosely on real battles.)

Anyway, I gave the defending Russians 500 points and the attacking Germans, 1000 for the Assault Scenario. The Germans need to take the objective in 6 turns (shrank from 8 because of the small table size.)

Summary - It didn't happen.
A view of the field of battle. Germans are attacking the town beyond the hills.
I entered most of the Germans as Mobile with a small reserve on the left flank, Center of the table to come in after I suppressed the Russians in the woods with my Stuka.

Well, just like you shouldn't rely on Arty to win the day, you can't rely on the Stuka to win the day. The first two turns saw bad command rolls for the Stuka. I got impatient and rolled my troops out on the flank. Dumb. Lost my MG unit immediately. The infantry squads on that side would eventually take 5 and 4 hits respectively before being pulled off and back to the farm house to lay down effective fire...but too late to make a difference.


Oh, yes, two sets of those hits and suppression came from being in the Stuka attack that both times deviated back just enough to catch the Germans in its wake.
Stuka does its job well...on everyone. : (
That was the left. On the German right, they made slow progress because after the slaughter on the left, I was too cautious and worried about casualties. The Germans breakpoint was only 3, compared to the Russian's 6 (now that I type this, I'm not sure why this is.)

In fact, now that I look at the German list I see that I only used "900 points of 900 available (1000 points selected." This quote comes from the great army builder page on the Specialist Military site. Hmm, I'll have to look into that.

The end result? Russian minor victory because the Germans didn't make the objective, but the Russians didn't inflict enough damage for a major. The Germans did inflict 4 killed units, so more aggression on the part of the Pz III could've help move them to breaking.

Next time options:
  1. Concentrate forces on one side and overwhelm. Probably the left and the woods, more room.
  2. Stuka again (bound to do better) and either flank further in and attack through the woods (probably should do this from two directions. The problem I see with this is that the Russians can then concentrate their defense. Though, with such low Command Values (8 and 7) they could run into problems moving their defense.
  3. I suppose smoke could be my friend by my smoke creation was absent. 
  4. As the Russian player, don't get any trenches, perhaps some wire to slow them down outside the town. But they could defend the town pretty strongly and do ok. A truck to pull that gun around would've been nice.
I began the process of getting the armies built, collecting my kit at 9:30. I finished the game around 1:50 AM (too late/early) but I accomplished my goal and it was very fun.

This was my 11th game of BKCII and I will still vote it as my number 1.

The Forces:
German
CO (10)
2 HQ (9)
FAC (8)
Recce Unit 222
5 Infantry Heer
3 Infantry Upgrades of AT Rifles
1 MG 34/42
1 81mm Mortar (need to check if it can produce smoke - might be a better use for dug in troops.)
1 Pz III 50mm kurz
1 Ju-87B Stuka

Russian
CO (8)
1HQ (7)
5 Infantry Regulars
1 ATG 37mm
3 t-26,  37mm.

The Video


Friday, October 10, 2014

Desert fences by Big Lee

One of these placeholder entries for me to remember and To spread the word about his cool work.

http://www.blmablog.com/2014/10/6mm-terrain-wire-fencing.html?m=1

Pic from his site - click the link above and read how he made them.

Monday, September 1, 2014

Lee Makes desert explosions

More good work and terrain inspiration. In this case, desert explosions for 6mm. Big Lee does it again. Picture is from his website.

I hate to say this, but I'm getting tempted to go into desert gaming for 6mm. Need to look for a good GHQ sale or an army someone wants to sell.


Thursday, December 12, 2013

Going Down the Thomos Hole

No, the title doesn't mean what you think it means you crazy fools.  It means that I've begun my descent into 6mm WWII Soviets.  

A friend has a very extensive collection of 6mm Germans, Soviets, and others and looking to get out of the scale and invest more heavily into 12mm (for his homebrew rules) and other scales for other periods.

So he's offered up his collection to the local crew for some great prices. Well painted stuff, most based and painted better than I could do. Much of it is GHQ (1st generation and up), some CnC, and a smattering of Heriocs and Ros tossed in for good measure. So basically, I'm buying them off and on as I save up a few bucks and load up each month.  Who knows, with the holidays approaching, I may have some extra cash.

So I should have everything I need in equipment to play the first couple IABSM scenarios out of the Vyazma or Bust campaign book. I will use Amis to be Soviets initially. And some trucks will also be Ami.  I need to get with him and see what he has that could also compliment some Command Decision Scenarios.

So, where does this leave my 15mm project? Slowed down. I stalled out because it will be ages before I have enough to play the Command Decision Scenarios. In addition, I've stalled out on the skirmish side of things having tried a few rules sets and finding them wanting. I really wanted to like Bolt Action. Then Rate of Fire...then Chain of Command. Though the last is still up for grabs because I've not played it officially yet. But I can tell that I may struggle with it for time sake.  

And then there's the homebrew of BKC in Skirmish form I may work on, though it's a lower priority.  

Am I sorry I've based them two to a stand for CD:TOB? Kind of. But ultimately not too bummed because I believe I would still like to give this a go.

And of course, here's a video of the collection with me sharing many of the same thoughts.

Thank you Dave for the great deals. And it looks like you may have yourself an annuity for the next few months!

And here's the story that originally inspired me, thanks Thomos.  Next time I'm in Singapore, I'll drop by and say hello.
From Thomo's site - used blatantly w/o his permission


Tuesday, December 10, 2013

Action at Galmanche Blitzkrieg Commander AAR

Action at Galmanche is the Too Fat Lardies take on this July 8, 1944 battle between the British and Germans. This scenario is found in the I Ain't Been Shot Mum rulebook and is the 3rd scenario, meant to introduce tanks and AT fire.

table
The Brits have a a mix of command values ranging from 7 to 9. The Germans are all pretty much 8 except the AT gun (7) and FAO (7) and the commander (9).  We have 3 full British platoons attacking 2 full platoons and one that is a squad short.  In this I also experimented with creating a tank killer team made up of small stand, carrying a PzShrek and also a similar PzFaust model. In addition, I created stands for the 50mm mortar units that went with each squad for the Brits...more on this later.

Basically, the British have to clear out all 6 buildings and destroy the AT gun. Tall order because I made the Germans SS. They were given 7 trenches and also could hide in the buildings. The forests north of the town were impassable by tanks.

I posted infantry units along the forest to get the boys while they traveled in the open. So dug-in and in forests. In addition, i placed the two tank killer teams in the middle behind the woods to react and move where they needed to go after the tanks.  I placed the AT gun looking down a road where the tanks were more than likely to come because of the woods.

Going back to the British, I decided I  wanted to push everyone through the woods and orchards to the Germans right. The Tanks would go through the orchards. We would overwhelm the right and then sweep to the buildings on the Germans left.

Now to the Game - the videos below go through the whole game - its a 5 video playlist.

A pregame British stonk gave a few hits here and there.

Here's a photo from the end of turn 5.
end turn 5
It's not looking good for the Germans because the forest is cleared and the orchard is open. The problem is that the tanks would sit 6cm or further back, out of range of the fausts in the hands of each squad and just blast away at them for a few turns. Not a problem for the Brits of course. But a hard lesson is coming for the Brits. I'd failed command rolls a few times for the Brits and this was slowing me down quite a bit.

The Orchard was going to be congested, and I realized the success of blasting away at the infantry so decided to route the CV7 led tank troop (3 Sherman 75s and a Jumbo) to the German left to start clearing out the buildings.

end turn 6
Good thing I did that, the group stalled at the orchard hedge and if the tanks would've waited, they would've just sat there. Instead they were able to move and then clear out the ss out of the woods, next to the houses on the right of the road.  The problem with the Germans, the AT gun had limbered up to move toward the right when the Brits started rolling. They were led by some weak ones and would miss a couple turns.

Turn 7 was very tough for the Brits, this is where they learned the toughness of infantry in close fighting. Whoops.  Two Sherman 75s lost to faust fire. You can see them smoking on the right. In addition, I'd forgotten to give the command rolls a -1 for the tanks driving in dense terrain. I added this later.
end turn 7
Turn 8 saw the German FAO finally have some success and put a bunch of units in Suppression including the CO and other HQs.  More on the German arty later. Suffice to say it was damaging but not terrible.  In addition, the AT gun finally woke up and took out a Sherman on the German left. I also believe it was here that the Brits on the German left had a bonus round and took out the troops in the front 2 buildings and then moved up to the orchard to finish off the next building. The Germans were going to abandon the buildings to protect the AT gun.  at seeing an opportunity, I decided to keep them there behind the building to get the tanks as they approached through the orchard. The attack on the German right by the Brits was stalling a little. However, the Germans gave up a building to hold the rear one before that squad took any more hits. (They were sitting at 4.)

Also, the German CO blundered to go off the table. They came back on turn 9 with -1 CV and only able to do something on turn 10.

end turn 8
Turns 9 and 10 went fast without a picture for 9 'cause it was getting hot and heavy and I thought for sure the Brits were going to clean up. And they would have except for the German FAO on turn 10 hit again and really laid waste. I believe 3 units were lost during this barrage. Including a tank. The middle was destroyed.

The Germans hiding behind the building on the German left, did their job as well and took out the Sherman 75 in the orchard. Also the Shermans went for broke and tried to destroy the AT gun, but only forced it to suppress and fall back, right to the edge of the table. 1 more CM and it would've been knocked out!

Also during this turn the British CO was Suppressed again.

At the beginning of turn 11, I rolled for the British breakpoint. It was 10 and they were right at it. Therefore, the roll had a modifier of 0, and i just needed lower than a 10...I rolled a 10. Game over, the Brits pull back.
end of game

Very fun game. According to boardgamegeek, this is my 10th playing of Blitzkrieg Commander and I'm really enjoying it. The last couple of games have been quite memorable.

A couple of changes I would make to the scenario. I wouldn't put separate 50mm mortars on the table. BKCII doesn't even have stats for them because they're modeled in the squad stats. Though it was fun having them...I will keep my stats, but they were quite useless. Though in the open, they may be ok.

I used the wrong stats for the German arty. They should've been 81mm mortars. Instead I used like 105mm stats. Basically every time they hit is was 18-24 dice against each unit. With the mortars, as prescribed by the scenario, it would be 6-8 dice. However, I'm slightly concerned this would hamper the Germans chances a bit.

The placement of the AT gun may have been ok if they'd come down that road, but they didn't until turn 6. But once it was hit, it was pretty weak.

And now, here are the videos.

Wednesday, October 9, 2013

BKCII AAR - North of Caen and an Ethics Question

I've grouped my video AARs of my play of the IABSM scenario, North of Caen, into a playlist.


It was an enjoyable game in that it went down to turn 9.  I would need to nail down a few of the details to play it again.  I think it would make a decent con game because it would introduce people to the rules fairly well, without armor and artillery.  Though, I would want to have armor, at least, in a game, because we all love playing with tanks.

Here's some info on the game. (See my question below on the ethics of releasing this information.)
North of Caen scenario table measurements


And units.


Germans CO 9, (2) HQ8, 6 Heer Squads, 2 MG42s

British Regulars CO 9, HQ 8, HQ 7, 9 Regular squads, 3 mortars rated at 2/80, (3) 12cm squares as pregame arty strikes rated with 4 dice against each unit under the templates.

Pregame arty templates
British have I break German force, or take 4 of the five buildings. Two buildings closest to the road junction are stone. Others are wood.

To take a building, the British need one unsuppressed squad or HQ in the building...I need to think through this part because standard BKC rules states that for an objective to be taken 3 unsuppressed squads and an HQ need to be in the area.  Which would mean leaving people in the buildings. Which, in this small of a scenario, I don't think you can afford to have a unit in there.  I want to say the last one with troops in the building.  They can even be suppressed.  In which case I would take this to the last turn because the Germans could've possibly taken on the of the buildings back because the British squad had 5 hits on it.


Next time I believe the Germans should set more foxholes up front, this is how the left flank stayed so resilent.  Possibly, on the right flank, just post up in the buildings and force them to cover the open ground.  The British, I wonder if grouping them all together might be a better strategy.

Now to the ethics question.  So this scenario comes out of the IABSM rulebook.  In fact, there are many scenarios I want to use out of other books and convert to BKC...or other games I'm playing.  Now, I don't have a problem with using them myself because I paid for them.  

However, should I post the details like troop lists and my map, and the objectives online for all to use? I'm giving credit to it and making slight modifications, but I'm not sure the scenario creators would be too keen. I'm pro, paying the creators for their work so I want to do right by them.  I like posting AARs and that means including some of the basics...but maybe I don't include that info and tell people to buy the books...maybe I answered my own question.

Please give me your thoughts on this.  

Friday, October 4, 2013

BKC II North of Caen AAR 1

I'm using a scenario out of the I Ain't Been Shot Mum rulebook to play a Blitzkrieg Commander II game.  As of this typing, I've finished turn 1 of 10.


Basically, the British, with 9 squads and 3 2" mortars have to break the Germans or take 4 of the 5 buildings at the road junction.  Defending this little hamlet are 6 German squads and 2 MG42s.


I like the way the board turned out, considering I was trying to make it quick and dirty.
Yellow boxes are pregame arty targets

It's such a small scenario, I'm wondering if this may make a good con scenario.  It doesn't have any tanks and the people love 'em some tank on tank action.
German right flank - looking at the oncoming Brits.
 So far, the pregame arty just inflicted 1 hit and suppression on a German right flank squad. And as is common with BKCII, the British squads didn't make it as far as I would've liked.  And one of the British left flank squads has 2 hits, but no suppression. Going into turn 2.


Thursday, October 3, 2013

Big Lee's 6mm Field Defences and more

Big Lee worked with some Leven Miniatures sandbags to make these cool looking 6mm dugouts.  Funny, i could use some of those right now in the scenario I'm playing. The photo is his and from his website.


Then, on the same day on my Reeder blog list I saw this tutorial on buidling trenches (sort of) Another good one at the One Sided Miniature Wargaming Discourse.

Welcome Lee Sharpe to the page, thank you for joining up.

Links to their pages:

http://www.blmablog.com/2013/10/6mm-dug-in-markers.html?m=1

http://onesidedminiaturewargamingdiscourse.blogspot.com/2013/10/not-exactly-trenches.html?m=1

Thursday, November 15, 2012

20 6mm Buildings Pt 5 and Finished

Thank you Dave for the buildings. Complete, except for the gloss and varnish sprays.  Now I just need a way to store these. I'm thinking a couple of boxes with pluck foam.

Any ideas?

Here are some pics and a video. (Note: When I say Gun Beryl and British Legion and show a photo with an "Obey" caption, I'm having a little fun with a couple of other Youtubers. We go back and forth with our goofiness. GunBeryl is a fast and great painter, both army and terrain. He's in Canada. British Legion is also a good modeller and strays into a variety of games...currently Dust Warfare. Good guy who is very generous with his shoutouts and trying to grow the YouTube community.  I would enjoy very much meeting these guys in person someday.)


Red Roof Colors

Hay/Straw Roofs

Stone Colors
 Links
Part 4 (I seemed to have skipped Part 3)
Part 2
Part 1

GunBeryl's Youtube Channel
BritishLegion1 channel

BTW, Dave, is my debt paid for the buildings?

20 6mm Buildings pt 4

It's amazing the details on the buildings. I'm hoping one more session: