Showing posts with label Interview. Show all posts

Tuesday, March 13, 2012

Dave's Maps and Aircraft Weathering

I asked Dave to share how he made his map and how he weathered the planes from Angels 20. I'll let Dave speak for himself:

First on the maps:
The game mat images were all "screen captures" of Google map sections.  The WWI field map surface was already digitally assembled into a high resolution image that I found on a fan website, and I added the trench section from a Google map image I found of a reenactor's battlefield in Pennsylvania. 
I used four overlays of the same trench image, but some were flipped, reversed, and rotated so as to break up the regularity of the repeat trench image.  The field and forest terrain on the master image was revealed by cutting away sections of the unwanted trench "overlay" using manipulation tools within my photoshop program (Paint Shop Pro), such as outlining and dragging away unwanted sections wholesale, and fine erasing along the borders of the wanting trench image(s) to reveal the "lower "map's fields and forest. 
Lastly, I captured a section of shell holes, and isolated them on a transparent texture layer, which I repeatedly applied to the completed field and trench image to "meld" in the war-torn trench sections to the more pristine surrounding forest and fields.
The WW2 map was a similar process, but I "screen captured" each section of the selected Google map images (from around Dover England), and assembled these into a complete large map image.  As I recall it took something like 10-12 individual screen map images to get the desired breadth of coverage. 
The open-ocean texture (beyond the coastal wave images) was a free-source ocean texture I found on the web, which I re-sized for proper scale, and once made into a multi-sectioned large image, was layered and "melded" to the coastal waters using the same image removal and erasing techniques as for the above WWI trench section work. 
The hex grid on the WW2 map comes from a number of sections of grids on a transparent layer which I overlaid in sequence to complete the pattern.  Knowing the overall map dimensions wanted, and the number of rows of hexes at a particular individual hex size that should fill the map's area is necessary so that the printed map comes out as desired.   I did "subdue" the opacity of the hex lines by successive eraser swipes (digitally), so that the hex outlines weren't so starkly contrasted against the map's background terrain.
The completed images files can be uploaded to a commercial printer who offers online service, and printed to the selected dimensions (in inches) on vinyl advertising banner material.  Comes delivered to your house in a sturdy packing tube, which serves for transporting the mat to wherever the game calls. :) 
And now, a little about his weathering of the Axis and Allies, Angels 20 planes. The models are pretty impressive as is. But his subtle work helped immerse me even more in the game. Here's Dave:
The pigment I used was "Secret Weapon Weathering Pigment" in "Exhaust Black" color, but I imagine any good brand of pigment will work as long as its dark enough to give a model's etched details enough contrast against the surrounding surface colors. 
I applied the pigment powder with a model brush making sure to dust it into the recessed details especially well, basically covering the entire model aircraft's upper surfaces completely with a thin layer of pigment  (doing this over a piece of paper to catch the excess which drops off during the application). 
After the pigment is applied, and after cleaning one's fingers off, with two sections of folded-over paper towels in reach, I began to wipe off the pigment on the model by drawing the towel flat across the surface, folding and turning over clean sections as needed (often). 
Once the majority of the pigment has been removed, only the pigment in the recesses should remain, providing an enhanced contrast to the panel lines and joints.  With the second paper towel, the insignia and things like painted stripes can be further cleaned with a moisten section of a towel, because the pigment tends to darken these areas, and they'll need to be brightened for better color clarity.
Lastly, the bottom surface must be checked and clean for any over-dusting, and then the model is ready for a coat a clear-flat spray finish, which will seal the pigment under it.
I think the pigment process could be used for other wargaming miniatures also, and especially for vehicles and even buildings.  Any models that have good surface detail (I'm thinking of trying it out on pre-painted WW2 1/144th scale tanks too.

Sunday, March 4, 2012

More 20mm Modern Miniatures - Somalians

Second Submission from timmy!  This post he's sharing his work on  the Somalian forces for his Somali Game at Recruits.  He's co-running a game for Ambush Alley's Force on Force supplement book titled,"Day of The Rangers," at the Recruits con, in Lee's Summit, MO, on March 31, 2012.

I'll let timmy! take it from here:
The first pic is of some of the lot that I got from Elhiem.  These figures are from Elhiem's Day of the Rangers 1/72 miniatures line.

I normally prime my figures brown but because I am in some what of a hurry I primed them black. This will help with any lines or areas that I might miss during the base coating. I prime my figures with a brush using Floquil Enamel paint.
Because of the quick deadline I chose not to paint any of these figures in camouflage. I choose two to four different colors to use and mix and match them for shirts and pants.  After the base coat is done I wash the entire fig in Raw Umber.  One of the most popular pots of paint from Games Workshop is called Devlin Mud.  Raw Umber IS Devlin Mud!!

After drying highlights are layered onto the figure using a "wet" style.
All of this is done with God's own paint brush, Winsor and Newton Series 7.
Q. What do you mean by "wet" style?
My palette is made very similar to the foam that comes in blister packs.  Most of the paint that I use is Vallejo which has a built in dropper.
 
When I'm painting highlights and shadows, I drop one or two drops of color onto the foam and or sponge. I then drop two to three drops of Vallejo Glaze Medium*, then two to three drops of water.  I mix this with another brush. This gives you a very thin layer of paint, almost translucent which can be applied in layers.  So that's why I call it "wet" style.

Now for base coating I really do not thin the paint at all, just drop it on the pallete and paint away. Sometimes I might add water depending on how thik the paint is.  The water is put into a bottle that Reaper sells that is very similar to the Vallejo bottles, the drop or hole size is the same.

It works wonderfully!!!! 

Of course though God's paintbrushes are a must!!  Believe me on this one.

btw - the pipe in the last pic is a custom made LOTR pipe made by Tom Johnson, of Luna Pipes, based in Washington state.

Another btw, from me, Itinerant: I told my wife recently that I would like to get a pipe, not to smoke, but just to have - you know, just because they look cool. She said to go for it. But I'm not going to smoke it, so it would be somewhat silly.
 *Here's a great tutorial and discussion of Glazes and how to use them.

Third btw, I'm going to have to learn some HTML, I don't like the way that blogger is formatting things.

Anyway, I hope you enjoyed. Thanks timmy! for the contribution. Any of readers have questions? I'll make sure timmy! gets them so he can answer you directly or here on the blog.

Monday, February 27, 2012

Modern 20mm Gamer Interview with timmy!

Want Bigger? Click it.
As I've recently posted, I've virtually met a local gamer (within 2 miles) that plays mainly in 20mm, but also dabbles in 6mm and others. He's know as timmy! on various forums around the webs and  He's considered starting his own blog.  Until he's ready to do that, I've invited him to contribute stories here.  We're still working through how this might work. 
As before: Click It.
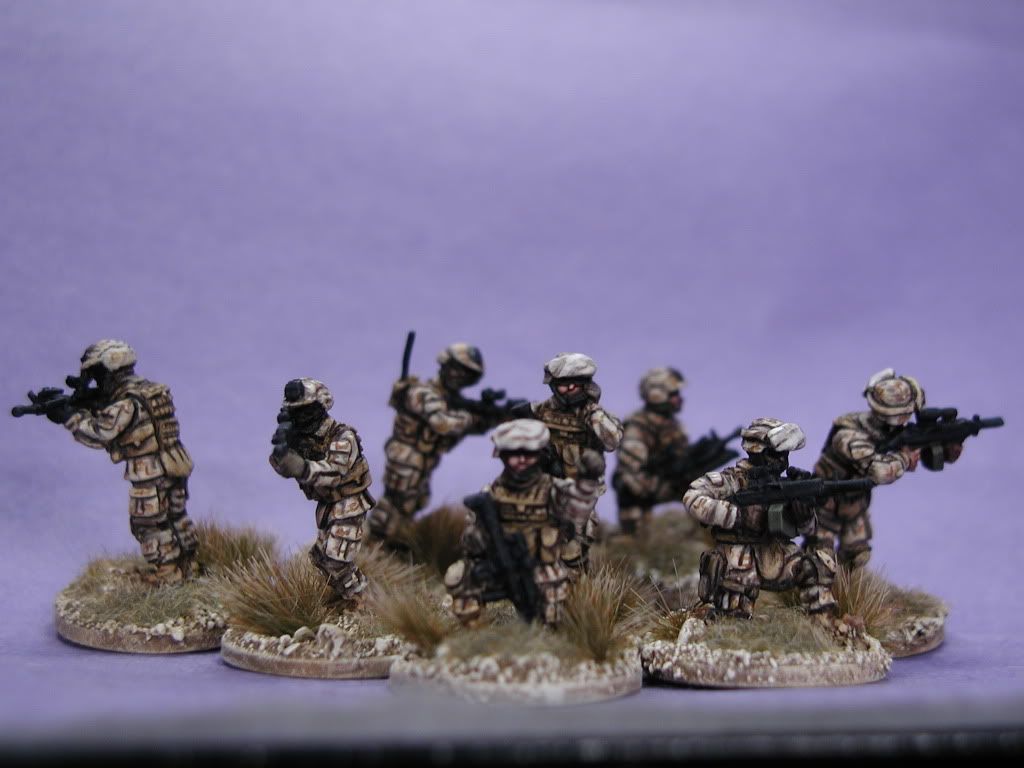
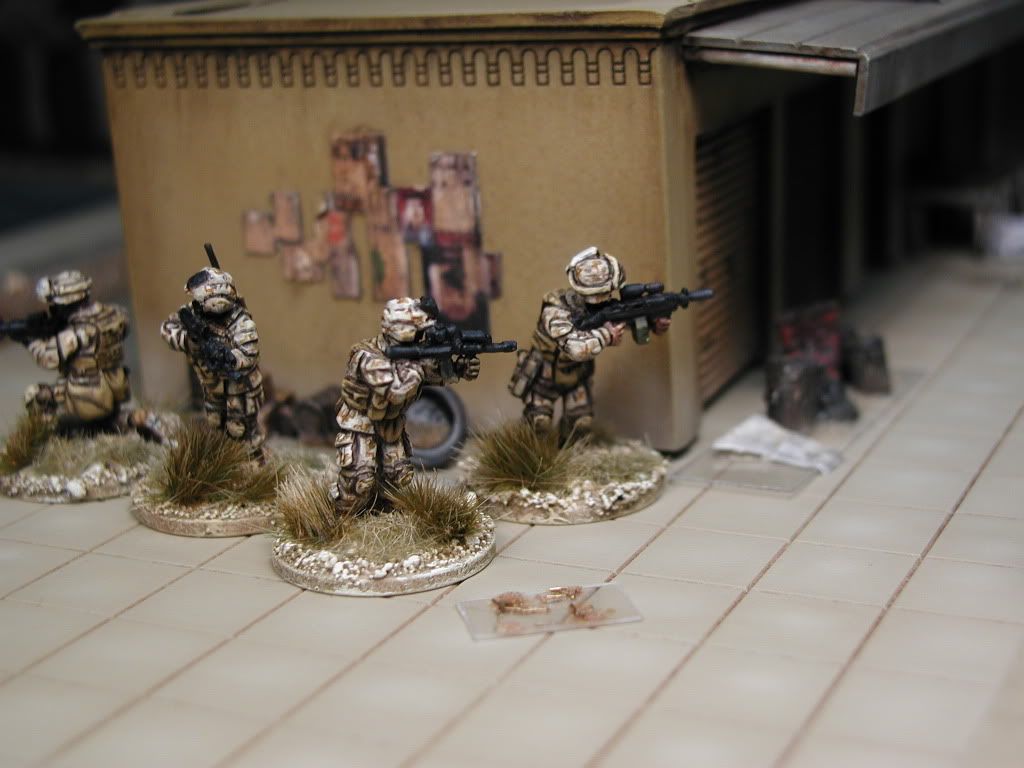
In the meantime I've asked him some questions about his work on 20mm modern miniatures for Force on Force!, by Ambush Alley Games. He's worked pretty closely with Sean, the creator of Force on Force. In fact, these first two pics are in preparation for an upcoming Force on Force supplement on Fallujah. 
Here you go, the first official interview for The Itinerant Hobbyist:
From Ambush Alley Forum
Q. What scale are these models? 
A. 20mm

Q.  Force on Force, correct?
A.  These pictures were taken for the set of rules called Force on Force by Ambush Alley. It is a supplement book strictly on Fallujah Iraq. Title unknown to me at this time. This is the third book where my models will be pictured. The first supplement book is titled Day of the Rangers:Somalia 1993.   The second book is called Bush Wars:Africa 1967-2010. 
Ambush Alley Forum - WIP
Q.  Did you create any of the terrain yourself or did you buy it all? - if you made it yourself, which parts?  
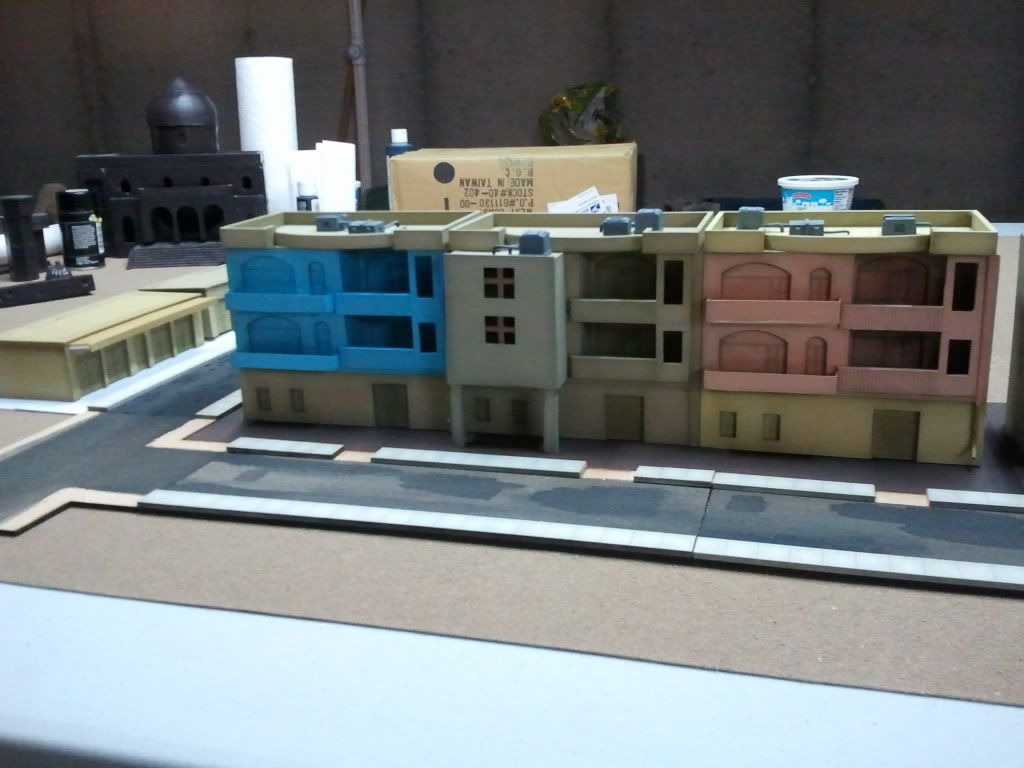
A.  The buildings and roads are done by Gamecraft miniatures. (Side note from TIH: Gamecraft posts some interesting videos. Being from the marketing world, this technique is great. Show the customer how to assemble and paint your product - tremendous. Especially in video form. Don't wait for your customers to do it.) The figures are done by Elhiem Miniatures. Various terrain pieces were scratch built.

Q.  What materials were used?  
A.  Color and black and white print outs shrunk down for signs and newspapers/trash. These were glued on clear plastic sheats that I cut. I sculpted trash bags and built the fruit stand.  The trash bags will be available for sale along with refrigerators and dumpsters on Combatwombatminiatures.com.  All scratch built by myself.
Ambush Alley Forum
Q.  Do you have a particular scenario/game you're preparing for or is this general terrain building?  
A.  Again this is for Fallujah. It is in no way finished. It will be highly detailed with several blocks for house to house fighting.
Q.  How long have you played Force on force? 
A.  I would say almost two years.

Q.  Why modern? As opposed to any other era? Why Fallujah?  
 
 A.  Fallujah has always been an area of interest of mine. I was planning on building a section anyway so it worked out well. I do a lot of modern gaming, especially in Iraq. I in 04 and 05 I was a contractor providing PSD/ executive protection for several companies. So I try to take my experience and put it in a game.

Ambush Alley Forums
Q.  What's your history with miniature wargaming? 
A.  At the age of four I started watching my father paint Airfix plastic figures.I stood there for hours!  The bug has always been there. I really got into official gaming when I was 15. A store called Epic Gallery moved close to my house. There is where I spent most of my teen years. Though I always did some sort of gaming with home rules with buddies of mine. Ive been playing with toy soldiers since I can remember.
Q.  What era and scale did you start with? 
A.  At the age of 15 I really didn't have a lot of money for things. I was very very fortunate to have a friend who would buy me armies for GW Fantasy.  I also played WW2, Napoleonics and Civil war.  Heck I play anything but my time is now devoted to painting and playing with 20mm and scratch building.

Ambush Alley Forums
Q.  Your GMing at Recruits, correct? 
A.  The founder of Ambush Alley (Sean) and myself will be running a Somalia scenario for the debut of their new supplement book Day of the Rangers.
Recruits Game Convention looks like an awesome Midwest convention in Kansas City/ Lee's Summit, Missouri. Just $5 to get in and it looks like a great time with lots of vendors and games being played. I was planning to go this year, but most travel plans had to be cancelled. We'll shoot for next year.
Readers, let me know if you like this format and what other questions I should be asking gamers, etc. What do you want to know about?