Showing posts with label WWII. Show all posts

Sunday, September 4, 2016

Horsa Bridge - Heroes of Normandie AAR


The Brits land at Horsa Bridge and it does not go well. 

Germans win 22-0. 

More importantly, they keep the Brits off the bridge which means they will get reinforcements at Pegasus.

Pics are here

Sunday, August 14, 2016

Saving Private Rex AAR - Heroes Of Normandie

Soloed this one as my son was helping my wife paint a room. 

US victory. This game has a lot of luck, like where Rex turns up. In this case right next to the US.

That said, two troops, including a Willys were destroyed after taking possession of Rex.  

Need to read up on the victory points and how those work.

Oh, Rex is the general's dog that's run away and a bunch of poor US souls have to go find him and bring him back.


US gets one more than the attacking Germans to win the melee.


Keep burns but a wounded Lt Parks grabs Rex and runs for camp. 


Friday, August 12, 2016

Godsend - Heroes of Normandie AAR

Wrapped up first full game of Devil Pig Games' Heroes of Normandie. Played the first Scenario, Godsend. Essentially a meeting engagement wrapped in a story about two squads bumping into each other as they look for a downward parachutist with a stash of secret orders.

Fun. Lots of little rules to remember, but that means some depth.


https://youtu.be/bLC9FPYbmig

Game start

Around turn 3

Beginning of turn 5


Thursday, August 11, 2016

Heroes of Normandie Demo AAR

Played first demo (solo) game of Heroes of Normandie. (Thanks a lot AAC Dave for turning me onto this via the podcast.)
It was enjoyable. Lots of little things to think about. I know I screwed up defense and shooting and assault once. 
With the cards and a live opponent, this could be a fun tense game.
I've avoided it because of the cartoony nature because it seemed irreverant. But as I thought about it and what it's purposefully trying to recreate, I got on board. Even ASL is like a movie, just without being blatant about the graphics. ASL is Saving Private Ryan and A Bridge Too Far. HoN is Where Eagles Dare, Kelly's Heroes, and Inglorious Bastards (and oh yeah, Sgt Rock and The Haunted Tank.) Does the Haunted Tank show up in this or Shadows Over Normandie?

German Victory. The Germans successfully get briefcase and take it back to base. However, leadership believes this is a rouse by the allies and don't believe a word of what it says.


Couple screenshots taken from the demo rules - free on their website. And I used the demo setup found in vassal. Great way to try it out.


Sunday, June 12, 2016

Review of Combat HQ by Jim Bambra

 I joined Jim's team of readers he's recruited to help him test out new ideas and as a resource to be an advance reader (which means a free copy of the rules...however, in this case, I'd bought them before I joined.) and provide a review of what I think. 


Perhaps many rules writer's do this, but this is my first experience I appreciate a creator looking out for ideas and constructive help in creating their products. 


To the rules. I downloaded his free set of armor rules (still available as of this writing) and then ended up purchasing the full set, which should say something. As of now, I've only played a small sample solo game of the armor rules. 


If you download the armor rules you will get a good idea of the flow of the full set which includes infantry, arty, and a few special rules about motorbikes, machine guns, open-topped vehicles etc. He's talking about future books covering more details like airborne, amphibious, etc. It would be nice to have it all in one book, but there's plenty here to keep most gamers busy. And his prices are so reasonable, that I don't mind the idea of paying a little for each release. 

Oh, there are a few army lists, US, German, Soviet, and Commonwealth - all late war. However, if you go to Jim's website he's been adding lists on his website, lardy style.
What I like most about these rules is that he covers them very thoroughly and from the perspective of a gamer. From what you need to play as far as markers onto the most simple steps to begin playing. Perhaps this comes from his computer game programming background where you must be detailed and thorough. 


That said, they're not complicated. I would say they're more complicated than my favorite set of miniature rules, Blitzkrieg Commander II and less complicated than one of my top five, Command Decision: Test of Battle.


I heartily recommend them for gamers looking for miniature rules where the stand = platoon and they want to fight engagements from WWII because of their details and low cost.


Amazon purchase link - not affiliate

Combat HQ website

Saturday, February 27, 2016

Playtest Armour Battles

I downloaded this free set of rules, written by Jim Bambra, Armour Battles Combat HQ. It's basically the Armour portion of a larger set of WWII rules where each stand is a platoon of troops and a troop of tanks.


They use an opposed die roll to help determine what you can do in your turn and it's also impulse/pulse driven throughout the turn. Meaning, player 1 performs an action with a unit or group of units, then player two does the same. This goes back and forth until each side uses all their available orders. Then a new turn begins with a new command roll.

Obviously I'm simplifying it a lot.
My first command roll. Blue are Germans. If you roll more 1's than 6's, you have a command failure. All your 1's go to the other side to use as wild dice. In this case, the Germans didn't get to do anything in the first turn. They still were able to opp fire.

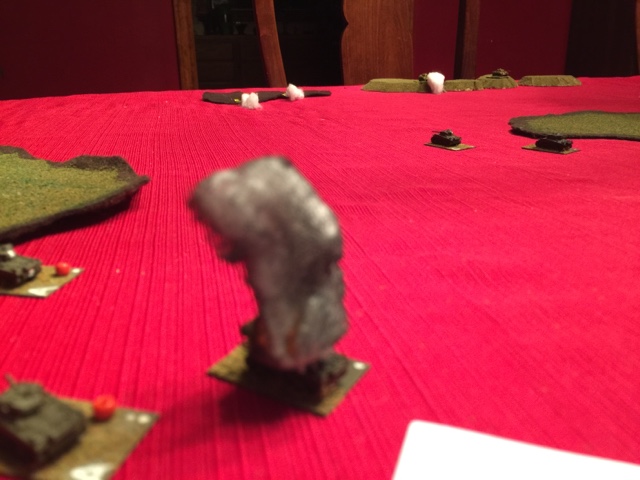
Burning M4.

When a unit takes 3 disruptions (hits) it is destroyed. When a unit is destroyed your side loses d3 off it's army's morale. The first army down to 0 morale loses. In this case, the Germans won the day with 1 morale left.

You can rally the disruptions off with a command. You also can take suppression off with commands.

I like the variable # of commands. I like how simple it was to get a battle going, even faster than my beloved BKC II. And I like the variable morale damage. 

I still don't have my head wrapped around the order system, both for units and the higher level staff command. In addition there are artillery rules I this free set.

The complete rule set is due out very soon. It appears it will have everything you need for a complete WWII gaming experience.

http://wargamesdesign.com
http://wargamesdesign.com/rules/


Friday, January 15, 2016

Iron Cross Game 1 Turn 1 AAR Video

Playing my first game of Iron Cross, from Great Escape Games. 

As this was loading I realized at least one rules mistake i was making.

Command only allows you to re-roll, not subtract 1 from the command roll.


Tuesday, December 29, 2015

Baccus to Release 6mm in 2016

Baccus Sixmm​​ is releasing their WWII range in 2016.

https://www.baccus6mm.com/news/29-12-2015/OutwitholdyearandinwiththeNEW/

Thursday, November 12, 2015

ASLSK S8 Ad Hoc at Chef-Du-Pont - US Turn 1

Trying some ASLSK S8 to get back into the system after a hiatus...basically trying to determine if I want to go all in.

Anyway, US T-1: 10-2 wounds as he moves in open ground Z1 from MMG in Q6. German squad in W6 building reduces and routs to V6


Monday, March 30, 2015

The Mighty Endeavor II, September 11-20, 1944 AAR

September 11-20, 1944 Turn 10
2nd Free French Armored were the first to roll through Paris, the citizens were ecstatic. They rolled on to sit outside of Charlons-sur-Marne.
SCS_TME2_51_01_Turn10BigPicture.jpg

Allies - Struggling a little with how to handle supply lines etc. I can isolate some units to the Southeast, but it won’t matter because they’ll be out of supply.

Le Havre is now surrounded, Beauvais fell and now units are North and East of that town. Amis rolled to the outskirts of the long forest that runs North to South outside of Langres. A heavy group is outside of Langres. Couldn’t attack though because I don’t have enough strength to attack there this turn.
SCS_TME2_51_01_Turn10North.jpg

Would like to narrow the front a bit to stay West and North of Vosges to the Channel.

South-Little bit of progress on the front. Made a hole in the lines. Plan is to starve out the Germans in Marseilles.

Germans creating lines of defense along road to from Somme to the North, to St Quentin, Reims, Salons-sur-Marnes, Langres, to Belfort.
SCS_TME2_51_01_Turn10South.jpg

12SS rebuilt and put into defensive line. Holding our own in South. Will extend defense around Marseilles in the next couple of weeks.

Monday, March 23, 2015

The Mighty Endeavor September 1-10, 1944

Sept 1-10, 1944 Turn 9   
Allies - Crossed the Siene by destroying a small training unit. Taking town of Rouen. 9th SS Armored Division destroyed (D3R3 Result)
SCS_TME2_51_01_Turn09_North.jpg
Made a lot of progress to the East. Approaching Troyes, Shalon-s-Saone and Dijon.

I want the units near Shalon-s-Saone to move to the East to block supply for the units down South.

Down South the attack went … “south” and resulted in an A2 result. 1 Airborne Task Force destroyed. Aaaargh. This is going  to be a tough nut to crack.

Germans
2SS Armored rebuilt and sent to Paris. This will probably be the last turn i can use Paris to place replacements.

Movement, I fell back out of Paris. Let them have it. Otherwise I risk losing 3-4 units. I’m reinforcing LeHavre just to attempt to keep a port of their hands longer.
SCS_TME2_51_01_Turn09_South.jpg
In the South, I’ve set up a 4 hex wide defensive line that will slow them down a bit.

Thursday, March 19, 2015

The Mighty Endeavor II August 21-30, 1944

August 21-30, 1944 Turn 8

Allies - supplies are hurting. Southern part of North France attack for Amis going okay. River line along Loire is looking pretty good and is now clear to Orleans. 4 Armor units try to exploit into Orleans - repulsed.

Southern Front, two German straggler units eliminated. Free French lose a step. They’ve turned their attention to Marseilles.

Germans backed up behind Seine. Will stay in Paris and duke it out - to slow them down and take advantage of ZOC.

Down South, Spreading out defenses to slow down potential flanking maneuver.

Allies are behind schedule (pronounced shed ule).


Wednesday, March 18, 2015

The Mighty Endeavor II August 11-20, 1944 AAR

11-20 August, 1944 Turn 7
Allies - South Beach landings on both beach hexes on either side of Toulon. No battles for they were uncontested beaches. Put the French  on the bigger Eastern beach because they have more units to bring on.

Also used the last invastion to land north of Caen, mainly to act as a supply port for the Commonwealth forces.

Port of Brest taken, but because of the lack of construction workers, it won’t be ready for 60 days. Not cool.

St Naziare taken without commandos.

There are some nasty Germans infantry from the 276th just East of Angers giving the Amis trouble, but they’re close to being surrounded. (German note, retreat to fight another day.)

Big news for the Commonwealth - 10th SS destroyed Northwest of Evreux, opening up a gap in the German lines. (German note: Perhaps it’s time to retreat to the other side of the Seine.)

Another gap made when the FJ division in 30.09 was dispatched.

Supply lines are thin. Thin. Thin. Just enough supply rules to keep it interesting for me.

Germans in North retreated back behind rivers and Paris was filled up. German units are kept on the flanks to slow down the allied movement.
In the South, the Germans have reinforced Marseille with 39 defense factors. Other units are spread out to protect flanks. Another German is moving down to reinforce Bordeaux.

Allies are actually behind schedule. I’m not even close to being where I need to be to launch Market Garden...if i would want to do something like that.

Whoops just eliminated our picture of the map at the end of turn 7.

Tuesday, March 10, 2015

The Mighty Endeavor August 1-10, 1944 AAR

August 1-10, 1944 Turn 6
Port of Lorient taken on the peninsula. Troops outside of Brest threaten the town for the next turn.
Rennes taken as well. St Brieue and Lannion also taken.

As allies I wonder how to keep the lines intact and the best way to split forces.
Looked at some books and maps for ideas. It looks like we’re ahead of schedule. Except for the attack in the South. I think I’ll attack two beaches in the South and one more up North to get more units and supply up there.

IMG_7108.JPG
Need the citation for this map
I like the idea of using the Loire as a division line or extent of operations to set up a defensive line. In addition, I’ll use te Loire to point me in the general direction of of Troyes, Langres, Belfort to the Rhine. I’ll need to launch a Southern attack to draw some German defenders and to get more supply.
IMG_7107.JPG
Need the citation for this map
Speaking of that - all my beach ports are gone next turn. Lorient comes into effect on Turn 11.

IMG_7109.JPG
Anthony Beevor DDAY inside book cover.
Germans are looking at the Seine as the next line of defense. They’ll use the river that is 2 hexes to the West as the first line and then back up slowly. I’m a little more curious how to handle the big open spaces to the south between the St Nazaire and Orleans.

The allies will need to worry about supply in that part of France.

Brest defenses are OOS, but since it’s a fort, they won’t need to surrender the next turn.

Friday, March 6, 2015

The Mighty Endeavor July 21-31, 1944 AAR

July 21-31, 1944 Turn 5
Brits destroy 2SS. Caen taken back. 12SS Destroyed. 17SS destroyed. (German now rethinking strategy a bit. Kev, please send the book to Todd Reed 73….) 77 Inf Div destroyed.

Ami side of things: US 3rd Armored reduced and 28th Inf Div destroyed in failed attack against the stubborn 158 Inf Reserve Division. (Rolled 2 on a 6:1 attack - that’s an A2 result.) But fortunately the 353 Inf Division wasn’t so stubborn and went down south of Avaranches.

During exploitation, the Amis go after the 158 Inf Reserves and at 4:1 get an A2 D1 result, so 4th Armored is destroyed and they only lose a step. Wow.

Germans move back in the Commonwealth sector to the river just to the “West” of the Seine. 3 Pz SS divisions. There are a few infantry divisions coming up to slow them down a bit, but it will be just a bit. The Brest Peninsula is pretty barren as well.

Fascinating game. I’m usually quite good on defense. I’m not so good here as the Germans.

Thursday, March 5, 2015

The Mighty Endeavor 2 July 11-20, 1944 AAR

July 11-20, 1944 - Turn 4
To make up for a missed move in turn 3, I moved that Lehr division and the 116 Arm Div into that 28.05 hole (I forgot to exploit.)Also moved 2SS up a hex.
Brits destroy 12SS, freeing up the Beaches a bit. Caen taken.
2 Canadian Armored in an expoitation is taken out by the 711 infantry div (who are also gone) but that’s a huge loss for what I got out of it.
Avaranches is taken.
2SS and 17SS are close to being surrounded.

Brits isolated units after an overrun in 28.08 and then suffered a D1r1 result. I took the loss to 11th Arm as a step and then eliminated them to ignore retreat result.

Need to figure out the supply and attack supply rules, this will come into play now. Just like in real life, supply will begin to be a stretch for the allies as they break out. Nicely modelled.

Basically Germans moved others into position to slow down the Amis from getting over to Brest and opening up another port too quickly...if that’s their plan... (which it is.)
Can’t decide as German if it’s best to slow down Allies by sacrificing Armor or if I should be pulling back. I’m thinking it’s best to battle them in the bocage. This may really hurt me.

Play note: this is tough playing such a strategic game solo. I’ve come up with plans generally what I’m trying to achieve like the Germans slowing them down in the bocage. However, as the battle spreads out now, I’ll need to make more complicated strategic decisions. For example, I’ve brought up the German 11th Arm from the south (based on a die roll) to slow down the Amis. When I came to a crossroads I rolled 2d6 comparing rolls and if the colored was higher they would protect the Brest side of things. Otherwise I would’ve taken them up toward Avaranches.

When it came to deciding if I would pull them up from the South, I decided it would happen on a roll of 5 or 6. It did and I moved them up.

Wednesday, March 4, 2015

The Mighty Endeavor II July 1-10, 1944 AAR

July 1-10, 1944 - Turn 3
Allies - 7 Air points for the Allies. Nice. Rebuilt reduced 5th Armored Division. Called in my one Carpet Bomb in 27.06 to unclog the British Beaches. 7:1 odds...result D2R2 - could’ve been better. But I’ll go with it. Little bit of Progress through the bocage. I’m anticipating a counter attack against the Guards units that have progressed passed the Orne in 28.06. Exploited 4, 5, and 7th Armored Divisions to take Granville and push the Germans into Avaranches.

The Allies need another port.

Germans - plan to keep on to keep clogging up the bocage. However, big question, do I move 12SS back on hex to make my counter attack against the Guards a 1:1 or do I move the reduced Lehr back to 29.07 and the 84th back to Caen and Leave 12ss threatening the beach? I did the latter. So attacking 1:1 and the result is [A1]D1r1. Great result. When the Germans get the brackets, they don’t have to take the loss. But now that I look at it, there’s a gap in that bocage. Oh bother.

The Brits choose to “No Retreat” because they don’t want to lose ground in the Bocage and they will have to take a loss anyway because they would have to retreat into an EZOC...so they hold their ground.

Monday, March 2, 2015

The Mighty Endeavor 2 July 1-10, 1944 AAR

July 1-10, 2944 - Turn 3
Allies - 7 Air points for the Allies. Nice. Rebuilt reduced 5th Armored Division. Called in my one Carpet Bomb in 27.06 to unclog the British Beaches. 7:1 odds...result D2R2 - could’ve been better. But I’ll go with it. Little bit of Progress through the bocage. I’m anticipating a counter attack against the Guards units that have progressed passed the Orne in 28.06. Exploited 4, 5, and 7th Armored Divisions to take Granville and push the Germans into Avaranches.

The Allies need another port.

Germans - plan to keep on to keep clogging up the bocage. However, big question, do I move 12SS back on hex to make my counter attack against the Guards a 1:1 or do I move the reduced Lehr back to 29.07 and the 84th back to Caen and Leave 12ss threatening the beach? I did the latter. So attacking 1:1 and the result is [A1]D1r1. Great result. When the Germans get the brackets, they don’t have to take the loss. But now that I look at it, there’s a gap in that bocage. Oh bother.

The Brits choose to “No Retreat” because they don’t want to lose ground in the Bocage and they will have to take a loss anyway because they would have to retreat into an EZOC...so they hold their ground.

Friday, February 27, 2015

Pavlov's House End Game AAR - Advanced Tobruk System

On to Turn 4.
German Initiative. Tank turns and fires it's 75 smack dab into the buidling next door. C2. Leader and Crew each reduce one and remember
they don't have to check for Morale...this is huge.
Question - In another impulse, I wanted to change the Vehicle's Covered Arc (VCA) in order to shoot the bow MG.
I can't see how it supposed to affect the casualty table. I see if it was shooting on the Hit Probability Table (HPT) it would be affected by a +3.

Germans were able to eventually take out the Leader and crew in the G13 Building hex.  However, the Russians quickly placed more
units in the mix to make sure it didn't stay open.

The Russian is taking a chance at not filling that hex up with the remaining units. The thinking, there needs to
be a unit in each building hex to resist the Germans. All the Germans have to do is be the last occupying good order
unit in one of the three building hexes. This slows them down, though thins out the effectiveness of the Russian
defense.

The Russians had a reason to celebrate as the Norhtern mortar K-Killed the North PZIV.

The Germans have strong stacks ready to fire and assault G13.

And now, turn 5
Germans won initiatitive and tried took out the troops in G13 again. The Russians answered by moving a 6-4-8 into the hex.
However, opp fire, even with a crawl, whittled them down C2 (making them flip to the weaker 4-4-6).

The commisar also moved up a hex in the building, leaving G15 open.

German CPl saw the opportunity and took his 6-5-6 on a sprint across rubble and shellhole strewn ground.
The commisar took a pot shot at them and inflicted a C1 result!. However, they didn't break and they moved
into the empty hex! Making this a German Victory, having successfully caputured =>4 building hexes.

Fun and down to the wire. Pretty much getting the rules down. I know I've made some mistakes, but I feel pretty
good about most of the rules. Well, I had to refer to them a lot, but a couple more games will help.

Now the decision is, do I use the full rules that arrived yesterday to play scenario 2 or stick with the basic?